
Connect to a PC to take part in Teams or Near Me calls
Room Kit and Room Kit Plus are easy to use for PC based video calls such as Teams, Near Me, Webex etc. An HDMI to USB converter will be required. There are many available, from under £20 to more than £500. We’ve tested a few around £30 and found them ideal but can’t attest to their longevity yet.
The Room Kit and Room Kit Plus will require Room OS 11 software. Please contact us to update your system and/or apply the correct settings. When properly configured the systems’ touch controllers will feature a ‘Call from Laptop’ button. We’ve produced guides on the conversion of both Room Kit and Room Kit Plus (please choose the appropriate conversion guide as the systems are different. The Room Kit is a combined camera/codec system whereas the Room Kit’s camera bar and processing codecs are separates).
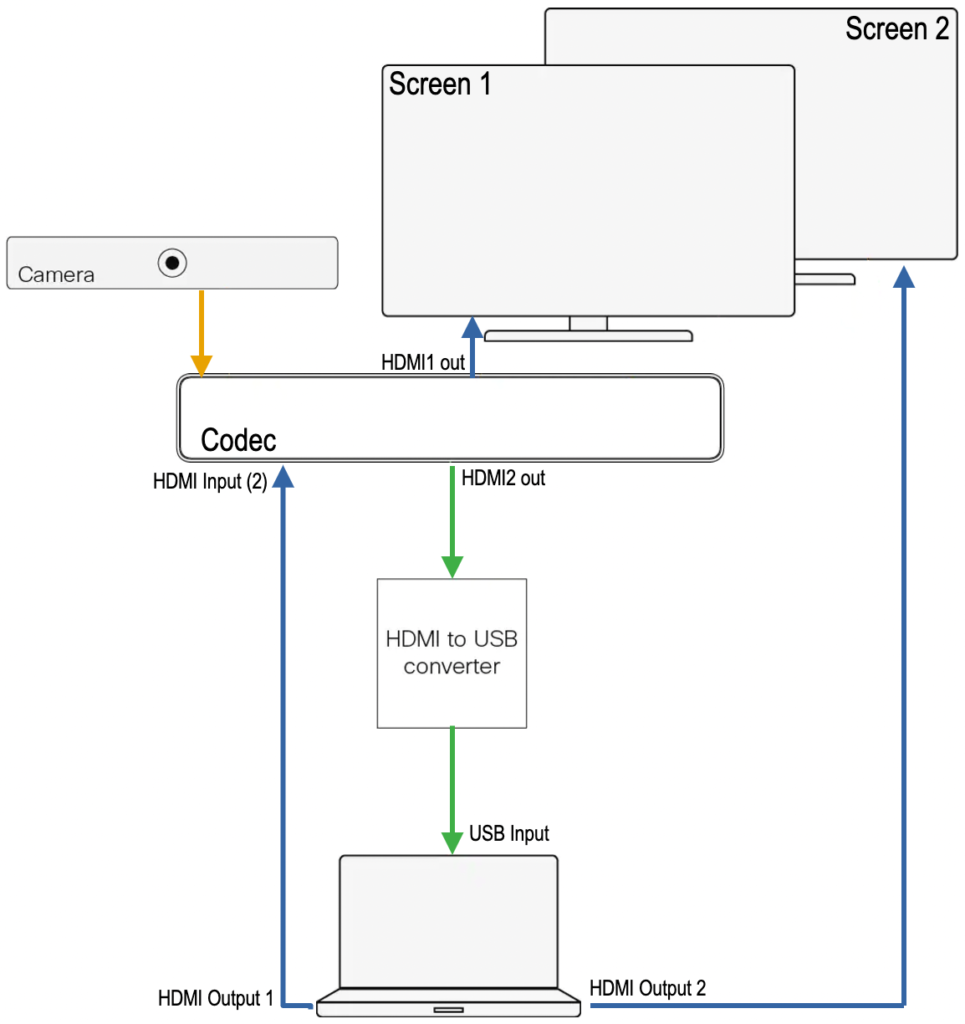
The HDMI to USB converter needs to be connected to one of the Room Kit’s HDMI outputs and one of the PC’s USB ports. The PC’s video-out port has to be connected to the Room Kit’s HDMI input connection.
N.B. The diagram to the left is for a Room Kit Plus. Links to conversion guides for both types of system are given above.
Once connected, open the PC’s meeting application e.g. Teams or Near Me and select the HDMI to USB converter as source for camera and microphone. Select the Webex device for speaker. Depending on the meeting application in use, this may have to be set by each user as they log into the PC. Clear instructions should be available in the room.
We recommend a PC is provided to ensure the correct cable connections are always in place and have produced end-user guides for both Room Kit and Room Kit Plus. Should users be expected to provide a laptop, we have guides for them too: Room Kit and laptop; Room Kit Plus and laptop.
For additional assistance, please contact our service desk.