Using Cisco video systems for MS Teams or Near Me calls
NHS Scotland used to provide in-house and cloud based registration for standards-compliant video systems such as those made by Cisco and Polycom. That infrastructure allowed the systems to call each other, call external systems and to call into MS Teams meetings. The infrastructure was decommissioned in January 2024. Thankfully, many of the standards-compliant systems make great USB video bars, at no or low cost, making them ideal for software video calling applications and platforms such as MS Teams or Near Me.
[You can read more about the history of NHS Scotland’s video provision or identify your video systems here.]
Basic systems – simply connect


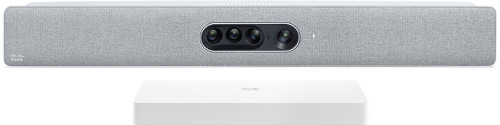
Cisco Room Kit Minis, Poly X30s and X50s were produced to cover use as either high quality USB video bars or to link to video infrastructure. Even these entry-level models feature speaker tracking, if desired.
To use as a video bar, you just need a USB cable linking the system to a PC. The video bar can then be chosen as the camera, microphone and speakers within any video calling software such as MS Teams or Attend Anywhere (the platform used for the Near Me service).
If you need more detail, please see our page on using a Room Kit Mini through USB.
Cisco Room installs – simply convert then connect
Cisco Room Kit and Room Kit Plus systems were installed in many locations throughout NHS Scotland, often integrated into full room systems linked to multiple screens. They have excellent cameras, microphones and speakers and are easy to convert for use with MS Teams or Near Me. They offer A/V quality surpassing many of the most expensive current video bars.
With twin-screen systems, where the second screen has been set as the PC’s extended desktop, MS Teams’ pop-out capabilities allows a split between people on one screen and shared content, notes or chat on the other.
Conversion
An HDMI to USB converter will be required. There are many available, from under £20 to more than £500. We’ve tested a few around £30 and found them ideal.
Both Room Kit and Room Kit Plus require Room OS 11 software prior to use as video bars. Please contact us to update your system and/or apply the correct settings. When properly configured the systems’ touch controllers will feature a ‘Call from Laptop’ button. We’ve produced guides on the conversion of both Room Kit and Room Kit Plus (please choose the appropriate conversion guide as the systems are different. The Room Kit is a combined camera/codec system whereas the Room Kit’s camera bar and processing modules are separates).
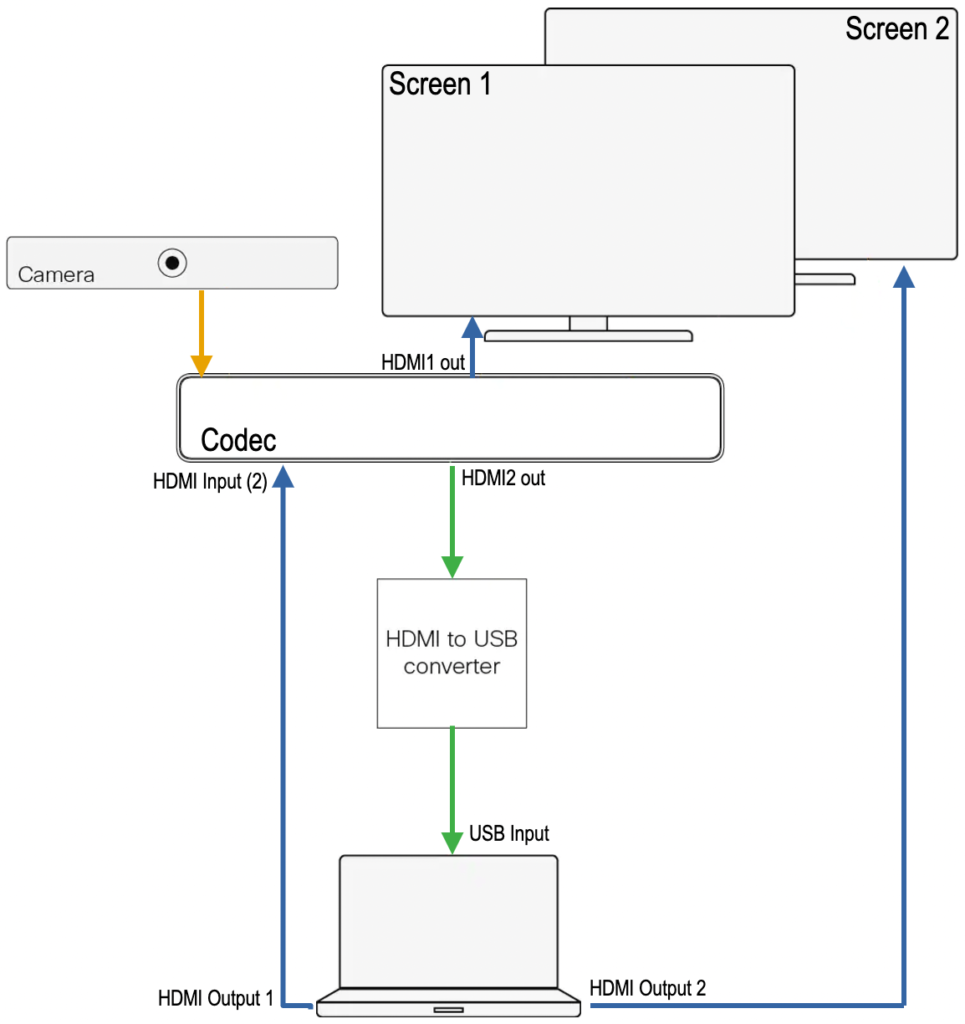
The HDMI to USB converter needs to be connected to one of the Room Kit’s HDMI outputs and one of the PC’s USB ports. The PC’s video-out port has to be connected to the Room Kit’s HDMI input connection.
N.B. The diagram shows suggested cabling for a Room Kit Plus. Links to conversion guides for both types of system are given above.
Using a newly converted video bar
Once connected, open the PC’s meeting application e.g. Teams or Near Me and select the HDMI to USB converter as source for camera and microphone. Select the Webex device for speaker. Depending on the meeting application in use, this may have to be set by each user as they log into the PC. Clear instructions should be available in the room.
We recommend a desktop PC is provided to ensure the correct cable connections are always in place and have produced end-user guides for both Room Kit and Room Kit Plus. Should users be expected to provide a laptop, we have guides for them too: Room Kit and laptop; Room Kit Plus and laptop. The easiest solution for laptop users is to have all your cables running to a USB-C hub.
For additional assistance, please contact our service desk. (Reuse guide for older systems.)